15 June 2024 · 10 min de lecture
How to deploy Kubernetes on a sovereign cloud
Can you build your own sovereign cloud without leaving the Kubernetes ecosystem? Xbit shares its hands-on experience, from bare metal to a ready-to-use managed cluster.
Building your own cloud with Kubernetes
At Xbit, we have a deep affection for Kubernetes, and we dream of a world where every modern technology will soon adopt its remarkable patterns.
Governments and private companies alike dream of building their own cloud infrastructure. But is it actually possible to do so using only modern technologies and approaches, without leaving the comfortable Kubernetes ecosystem behind? Our work building Xstack forced us to dive deep into exactly that question.
You might argue that Kubernetes was never meant for this, and ask why not simply use OpenStack for the bare-metal servers and run Kubernetes on top as intended. But doing so would simply hand responsibility from your hands to those of your OpenStack administrators, adding at least one more huge, complex system to your ecosystem.
Why make things more complicated? After all, Kubernetes already has everything it needs to run tenant Kubernetes clusters at this stage.
Here we share our experience building a Kubernetes-based cloud platform, highlighting the open-source projects we use ourselves and believe deserve your attention. You will discover how we prepare managed Kubernetes straight from bare metal using only open-source technologies, starting from the base layer of data-centre preparation, running virtual machines, isolating networks and setting up fault-tolerant storage, all the way to provisioning full Kubernetes clusters with dynamic volume provisioning, load balancers and autoscaling.
In this article, we are kicking off a multi-part series:
- Part 1: laying the groundwork for your cloud. The challenges of preparing and running Kubernetes on bare metal, and a ready-made recipe for provisioning the infrastructure.
- Part 2: networking, storage and virtualisation. How to turn Kubernetes into a tool for launching virtual machines, and what that takes.
- Part 3: the cluster API, and how to start provisioning Kubernetes clusters at the push of a button. How autoscaling, dynamic volume provisioning and load balancers work.
We will try to describe each technology as impartially as possible, while sharing our own experience and explaining why we chose one solution over another.
Let's start by understanding Kubernetes' main advantage, and how it has changed the way we approach using cloud resources.
It is also important to understand that using Kubernetes in the cloud and on bare metal are two very different things.
Kubernetes in the cloud
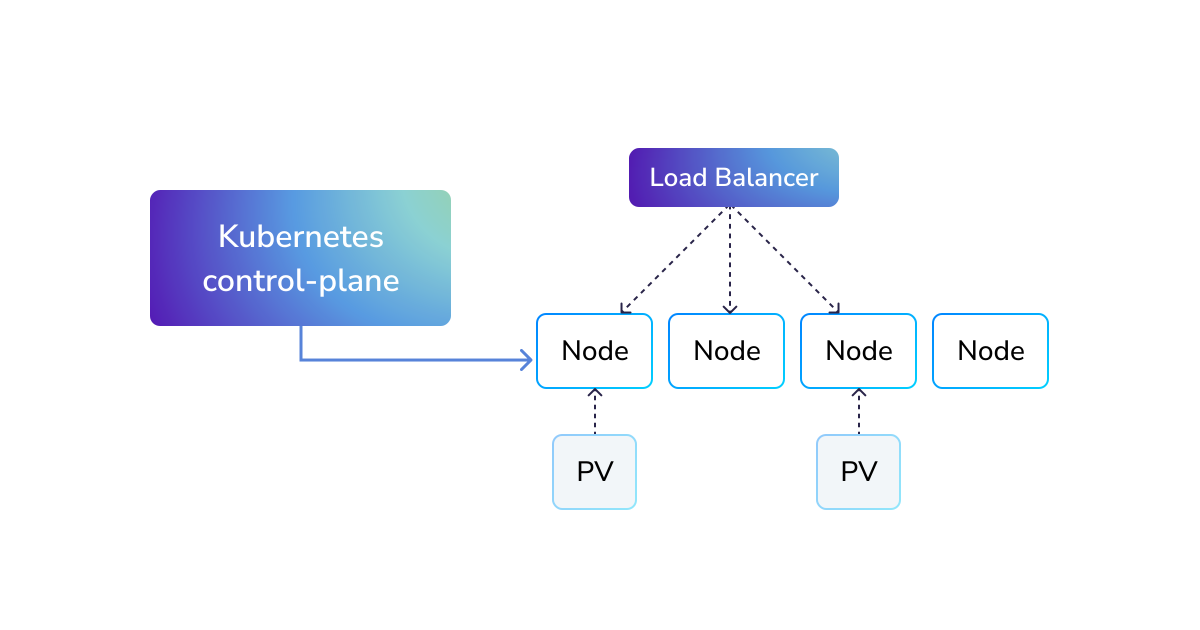
When you use Kubernetes in the cloud, you don't have to worry about persistent volumes, cloud load balancers or the node-provisioning process. All of that is handled by your cloud provider, which accepts your requests in the form of Kubernetes objects. In other words, the server side is completely hidden from you, and you don't really need to know exactly how the cloud provider implements it, because that isn't your responsibility.
Kubernetes provides practical abstractions that work the same way everywhere, letting you deploy your application on any Kubernetes cluster in any cloud.
In the cloud, you very often have several distinct entities: the Kubernetes control plane, virtual machines, persistent volumes and load balancers, each as its own separate entity. Using these entities, you can build highly dynamic environments.
Thanks to Kubernetes, virtual machines are now seen merely as a utility entity for consuming cloud resources. You no longer store data inside the virtual machines themselves. You can delete all your virtual machines at any time and recreate them without breaking your application. The Kubernetes control plane will keep track of what needs to run in your cluster, the load balancer will keep sending traffic to your workload, simply switching the endpoint to send traffic to a new node, and your data will stay safely stored in external, cloud-provided persistent volumes.
This approach is fundamental to using Kubernetes in the cloud. The reason is obvious: the simpler the system, the more stable it is, and it is precisely for that simplicity that you are paying for managed Kubernetes in the cloud.
Kubernetes on bare metal
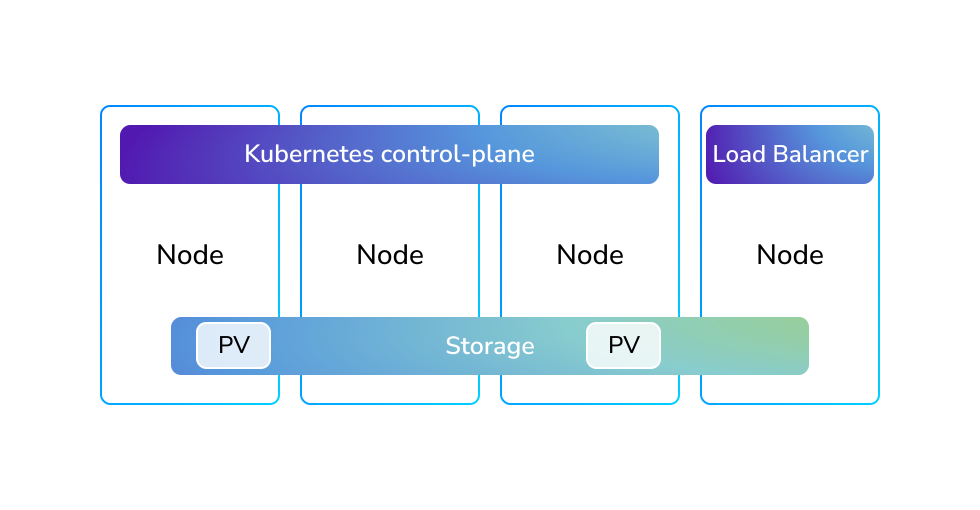
Using Kubernetes in the cloud is genuinely simple and convenient, which is not the case for bare-metal installations. In the bare-metal world, Kubernetes becomes unbearably complex instead, chiefly because all the networking, backing storage, cloud load balancers and so on typically run inside your cluster rather than outside it. As a result, such a system is far harder to update and maintain.
Judge for yourself: in the cloud, updating a node usually means deleting the virtual machine (or even running kubectl delete node) and letting your node-management tool create a new one from an immutable image. The new node joins the cluster and 'just works' as a node, a very simple pattern that is widely used in the Kubernetes world. Many clusters spin up new virtual machines every few minutes, simply because they can take advantage of cheaper spot instances. But when you have a physical server, you can't just delete and recreate it: for one thing, it often runs certain cluster services and stores data, and its update process is significantly more complicated.
There are various approaches to solving this problem, ranging from in-place updates, as done by kubeadm, kubespray and k3s, to fully automated provisioning of physical nodes via the Cluster API and Metal3.
I am fond of the hybrid approach offered by Talos Linux, where the entire system is described in a single configuration file. Most of that file's settings can be applied without rebooting or recreating the node, including the version of the Kubernetes control-plane components, yet this approach keeps Kubernetes' maximally declarative nature intact. It minimises unnecessary impact on cluster services when updating bare-metal nodes, and in most cases you won't need to migrate your virtual machines or rebuild the cluster's file system for minor updates.
Laying the foundations for your future cloud
Let's say you have decided to build your own cloud. To start with, you need a base layer. You have to think not only about how you will install Kubernetes on your servers, but also how you will update and maintain it, from kernel updates to installing the necessary modules, packages and security patches. You suddenly have to think about far more than you would when using an off-the-shelf managed Kubernetes in the cloud.
Of course, you can use standard distributions such as Ubuntu or Debian, or consider specialised distributions such as Flatcar Container Linux, Fedora Core and Talos Linux. Each has its own pros and cons.
We use several specific kernel modules, such as ZFS, DRBD and OpenvSwitch, so we decided to build a system image with all the necessary modules baked in ahead of time. In our case, Talos Linux turned out to be the most practical solution. For example, the following configuration is enough to build a system image with all the required kernel modules:
arch : amd64 platform: metal secureboot: false version: v1.6.4 input: kernel: path: /usr/install/amd64/vmlinuz initramfs: path: /usr/install/amd64/initramfs.xz baseInstaller: ImageRef: ghcr.io/siderolabs/installer:v1.6.4 systemExtensions : - imageRef: ghcr.io/siderolabs/amd-ucode:20240115 - imageRef: ghcr.io/siderolabs/amdgpu-firmware:20240115 - imageRef: ghcr.io/siderolabs/bnx2-bnx2x:20240115 - imageRef: ghcr.io/siderolabs/i915-ucode:20240115 - imageRef: ghcr.io/siderolabs/intel-ice-firmware:20240115 - imageRef: ghcr.io/siderolabs/intel-ucode:20231114 - imageRef: ghcr.io/siderolabs/qlogic-firmware:20240115 - imageRef: ghcr.io/siderolabs/drbd:9.2.6-v1.6.4 - imageRef: ghcr.io/siderolabs/zfs:2.1.14-v1.6.4 output: kind: installer outFormat: raw
Using Docker
Next, we use the Docker command-line tool to build an operating-system image:
cat config.yaml | docker run --rm -i -v /dev:/dev --privileged "ghcr.io/siderolabs/imager:v1.6.4" -
This gives us a Docker container image with everything we need, which we can use to install Talos Linux on our servers. You can do the same; this image will contain all the necessary firmware and kernel modules.
But that raises the question of how to deliver this freshly built image to your nodes?
We had the idea of PXE booting for a while. Unfortunately, though, that doesn't help you deploy your very first parent cluster, the one that will contain all the others. So a solution was prepared to help you do the same thing using the PXE approach.
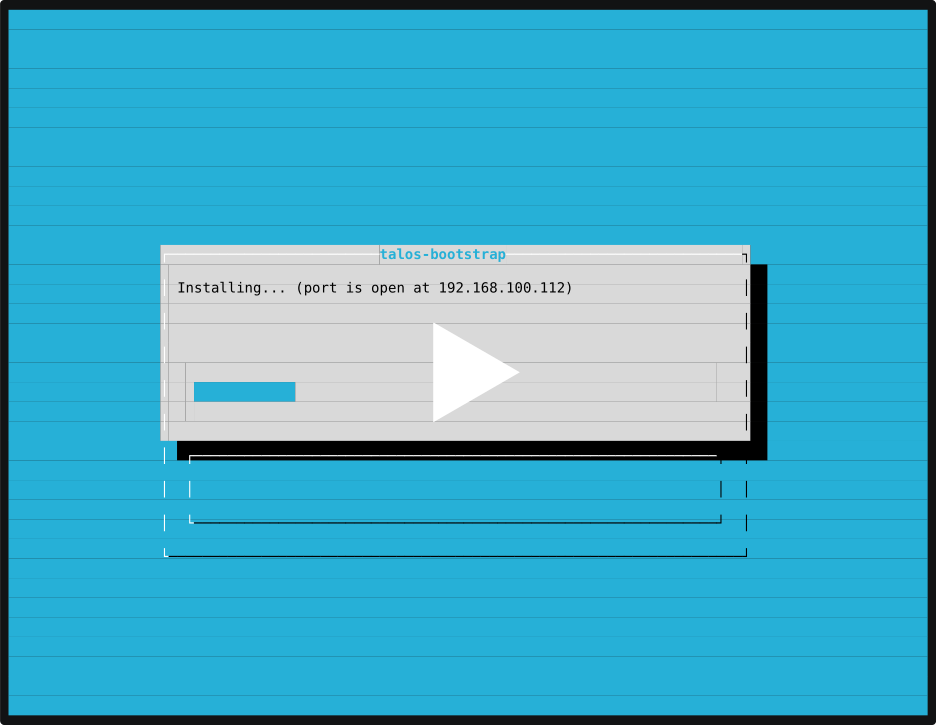
Essentially, all you need to do is run temporary DHCP and PXE servers inside containers. Your nodes will then boot from your image, and you can use a simple Debian-style script to help bootstrap them.
The source code for the talos-bootstrap script is available on GitHub.
This script lets you deploy Kubernetes on bare metal in five minutes and get a kubeconfig to access it. That said, plenty of unresolved questions still remain.
Delivering system components
At this point, you already have a Kubernetes cluster capable of running various workloads. It isn't fully functional yet, though: you still need to set up networking and storage, and install the necessary cluster extensions, such as KubeVirt for running virtual machines, along with the monitoring stack and other system-wide components.
Traditionally, this is solved by installing Helm charts in your cluster. You can do this by running helm install commands locally, but that approach becomes impractical once you want to track updates, or if you have several clusters that you want to keep consistent. In fact, there are many ways to do this declaratively. To solve this problem, I recommend using GitOps best practices, tools like ArgoCD and FluxCD.
While ArgoCD is more convenient for development, with its graphical interface and central control plane, FluxCD is better suited to building Kubernetes distributions. With FluxCD, you can specify which charts, with which parameters, should be deployed, and describe the dependencies between them. FluxCD then takes care of everything for you.
It is advisable to do a one-off installation of FluxCD in your newly created cluster and hand it the configuration. This will install everything that is needed and bring the cluster to its intended state.
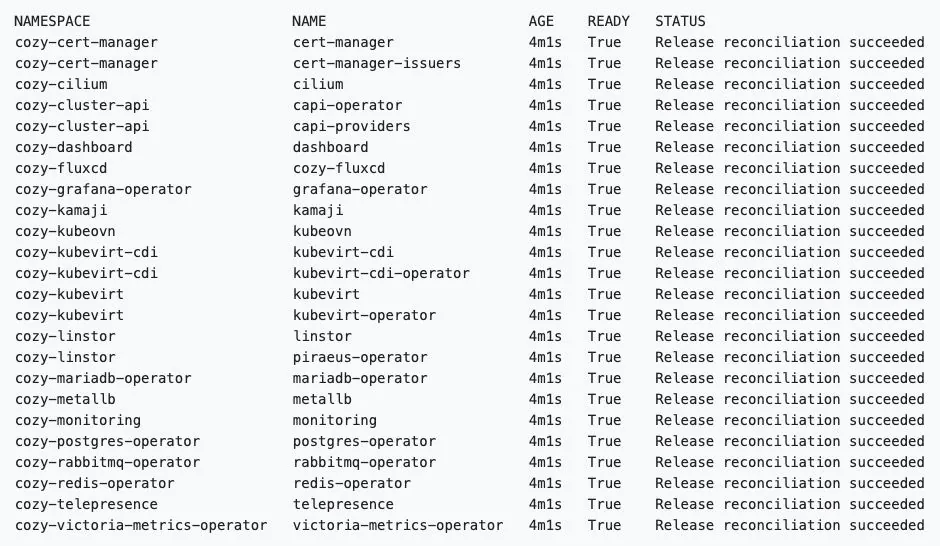
By doing a one-off FluxCD installation in your newly created cluster and configuring it accordingly, you let it automatically deploy every essential component. This lets your cluster upgrade itself and reach its desired state. For example, after installing our platform, you will see the following Helm charts pre-configured with the system components.
Conclusion
This gives you a highly reproducible environment that you can hand to anyone, knowing it will work exactly as intended. That is exactly what the Xstack project does, and you can try it for free.